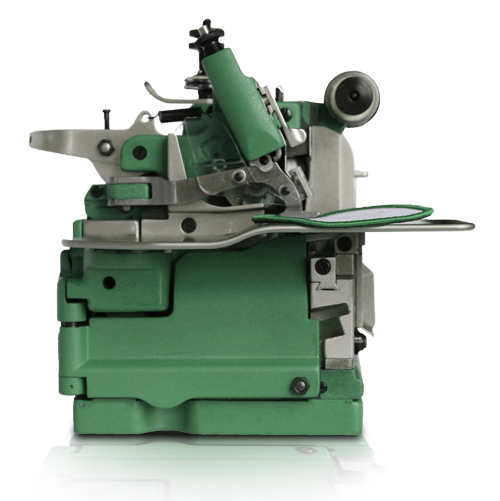
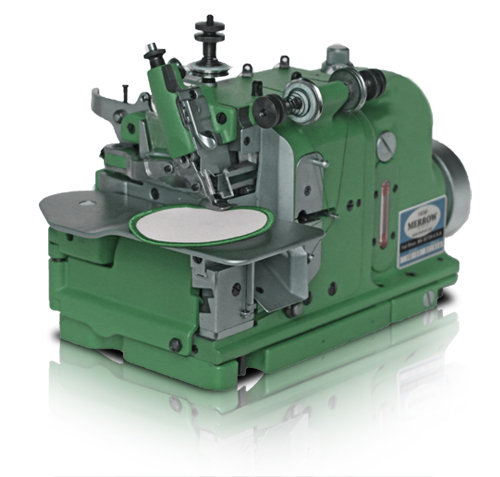
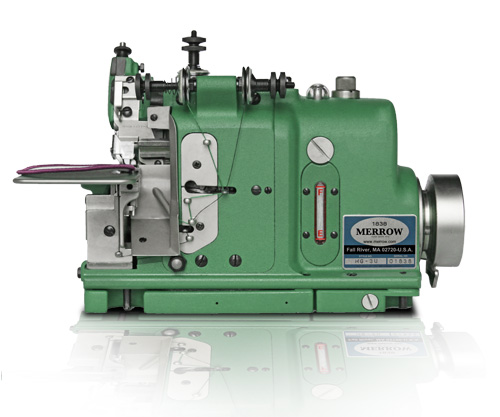
MG-3U | INDUSTRIAL SEWING MACHINE FOR EMBLEM EDGING
| |
| OPERATING SPEED |
5500 RPM |
| STITCH WIDTH |
1/8"-3/16" |
| STITCH RANGE |
20 - 40 SPI |
| STANDARD NEEDLE |
MERROW 4SDT |
| MERROW NEEDLE RANGE |
MERROW 3SDT-5SDT |
| FEDERAL STITCH TYPE |
505 |
| MOTOR REQUIRED* |
Merrow M12, 1/2HP, 3450 RPM |
| NUMBER OF THREADS |
3-6 |
MG-3U Applications
The Advantage of the MG-3U
The Merrow MG-3U is a 3-thread industrial sewing machine that is meant for putting a decorative edge on emblems and patches. It makes a 1/8" to 3/16" stitch at a standard rate of 28 SPI (though this can be decreased or increased to 20 or 40 SPI respectively), yet even while running at 5500 RPM still operates under 90 dbA. The MG-3U carries a 10 year warranty, though it is expected to run for years after that with routine care.
WHY it's better
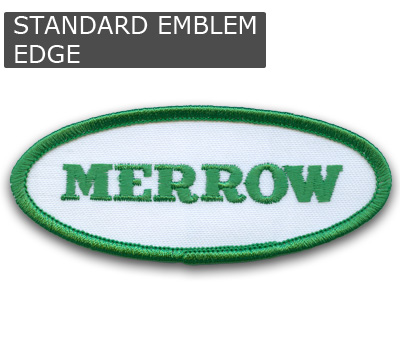
The Merrow Edge is the standard bearer for emblem edging on smaller patches, badges, and insignias. Noticeable for its finish and regularity, the Merrow Emblem Edge is a distinctive mark of quality that can only be made by the Merrow MG-3U.
HOW it's better
The MG-3U uses lightweight moving parts and needle bearings that are manufactured to extremely high tolerances, permitting the fast and smooth starts and stops inherent in intermittent operations like emblem edging. As a result, sewing edges on an MG-3U assures a uniformly finished, unmatched stitch.
WHERE it's used
The MG-3U is a versatile industrial machine that will satisfy the needs of the local emblem shop to the factory producing thousands of patches per day.
MG-3U Stitches
Get the flash player here: http://www.adobe.com/flashplayer
Merrow Machine Advantages
HERITAGE
Since 1838 Merrow has manufactured the world's best overlock sewing machines. A Merrow Machine is built to sew a more precise stitch and operate longer than any other competitive sewing machine in its class.
Merrow Machines are engineered and manufactured more carefully, designed to last decades, and supported with a network of 156 agents in 65 countries. The Merrow Sewing Machine is The Most PRECISE and TOUGHEST sewing machine manufactured in the world
Overlock stitching was invented by the Merrow Machine Company in 1881. Merrow's original three-thread overedge sewing machine is the forerunner of contemporary overlocking machines. Over time, the Merrow Machine Company pioneered the design of new machines to create a variety of overlock stitches, such as two, and four-thread sergers, the one-thread butted seam, and the cutterless emblem edger. Today Two- and three-thread formations are also known as "merrowing".
In 2010 Merrow Machines are engineered and built in Fall River, MA.
DURABILITY:
Quality of Materials
Our parts and machines are handcrafted and handbuilt
Cams NOT pistons -- Proprietary Cam Technology - Different from all other Sewing Machines
We're the only manufacturer in the world building Cam-driven sewing machines that stand up to heavy use. Merrow's Cam-driven machines produces a superior quality stitch. Using sophisticated 5-axis computerized milling machines, we've succeeded in developing proprietary high-technology components offering faster, quieter, operation and remarkable durability.
Merrow Cams are Machined to Exacting Dimensions Tolerances are held to .001: the tightest in the industry. They have been designed to operate continuously between 2200 and 5500 RPM. Merrow Cams allow a Merrow Machine to create a perfect stitch while ensuring that the sewing machine will last a lifetime.

Special consideration should be paid to the intricacies of Merrow's Cam Technology:
- The Cam groove width and the final surface finish of the Cam groove are created with proprietary manufacturing technology that allows all sides of Merrow's Cam to have an equal, highly polished and uniform steel surface, this results in an approximate coefficient of friction, when lubricated, of .06 or lower.
- Cam gear teeth are cut to a unique specifications with the sides of each tooth shaved to create a proprietary profile. This reduces heat when running.
- Hardness and metallurgy of the Cams are continuously modified, improving the durability of the Cam. The Benchmark for the durability of a Merrow Cam in continuous operation is more than 30 years of operation without failure.
VERSATILITY (for OVERLOCK SEWING):
Sew thousands of different Material Types
Woven Fabric, Knit Fabric, Terry Towel, Denim, Technical Textiles AND Nonwovens. While the machines sew exceptionally on mid-weight woven fabrics, it performs well on a huge number of materials from vulcanized rubber to fiberglass to insulation.
With more than 645 different needle plates and feed dogs, we can modify the sitch to accomodate more demanding fabrics
MERROW Will Build you a CUSTOM MACHINE at NO EXTRA COST
STEP 1: Send us your Material
We will build out a custom machine, at no charge, and sew your material off on the MG-3U (or other machine if appropriate). If you would like a video of the process we will provide this along with the sewn sample.
CONTACT MERROW FOR MORE INFORMATION ABOUT CUSTOM STITCH SAMPLES
email: sales@merrow.com
phone: 508.689.4095
fax: 508.689.4098
STEP 2: We will put you in contact with one of our 156 service providers in 65 countries
We will send the completed stitch sample to them, and they will assist you with the purchase and installation of the Merrow MG-3U
MERROW parts can be Replaced
Availability of Spare Parts
Merrow maintains an inventory of SPARE PARTS for all Merrow Sewing Machines for almost all legacy machines (600 models), ALL Parts are available immediately
Spare Parts QC is Rigorous
You can depend on the parts Merrow provides as all Genuine Parts are machined to very specific tolerances and tested before shipping
Sales, Support and Service
Merrow sells and services all products through a network of sales agents around the world. With 165 agents in 65 countries we are confident that you will find local support. Please feel free to call us directly for product information and stitch samples
SALES
SUPPORT
Local Support in 65 Countries
Contact us directly to find a local agent to setup your Merrow Machine or train your operators
The Best Service Website in the Industry
Enjoy free access to our
support online, our
interactive parts guide and
detailed operation instructions.
SERVICE
Factory Service Program
To make replacing parts and servicing your machine as easy as possible, Merrow has a factory service program with a fixed $299 fee and FREE SHIPPING.
Should your machine need service, we will ship you a box to send us your machine in, replace the needle, loopers, cutters and any other worn parts upon
receipt, and ship it back to you. To learn more, call us at +001 508 689 4095