

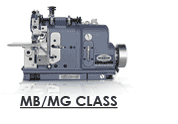
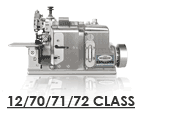


you're viewing: CROCHET class technical information
To mount Merrow Class 18, 17, and 15 machines follow these steps:
- Place Mounting Block (wood) underneath machine and set on table with Hand Wheel (Pulley) end near Belt Slot.
- Put V-Belt around Motor Pulley and Hand Wheel; align so belt is centered or to right edge of the Belt Slot.
- Trace an outline of the Mounting Block (underneath the machine) onto the tabletop with a marking pen.
- Remove the V-Belt and the machine. Place the Mounting Block within the outline drawn in the previous step.
- Now mark the hole in the center of the Mounting Block onto the tabletop.
- Remove Mounting Block, and drill hole (approximately 1/2" or 13mm diameter) through tabletop.
- Replace Mounting Block, machine and V-Belt.
- With bolt provided fasten machine and Mounting Block to tabletop from the bottom.
- Tighten/adjust V-Belt with the Adjustment Nuts on the Motor.
- Attach Thread Stand to tabletop.
To mount FJ and FJT class machines follow these steps:
- Place machine on table with Hand Wheel (Pulley) end near Belt Slot.
- Put V-Belt around Motor Pulley and Hand Wheel; align so Belt is centered or to right edge of the Belt Slot.
- Trace an outline of the machine base onto the tabletop with a marking pen.
- Remove the V-Belt and the machine. Place the template below within the outline drawn in the previous step.
- Now mark the hole in the center of the template onto the tabletop.
- Remove the template, and drill hole (approximately 1/2" or 13mm diameter) through tabletop.
- Replace machine and V-Belt.
- With bolt provided fasten machine to tabletop from the bottom.
- Tighten/adjust V-Belt with the Adjustment Nuts on the Motor.
- Attach Thread Stand to tabletop.
| Click here to download FJ & FJT3 Series Machine Mounting Template (PDF 16K) |
Speed
Plain Crochet
15 Class machines 1000 – 1400 s.p.m. Where operations permit.
17 Class machines 1000 – 1400 s.p.m. Where operations permit.
18 Class machines 1000 – 1400 s.p.m. Where operations permit.
(Model 18-S should not be run above 1200 s.p.m.)
Shell Stitch
22 Class machines 1200 – 1500 s.p.m. Where operations permit.
27 Class machines 1200 – 1500 s.p.m. Where operations permit.
35 Class machines 1200 – 1500 s.p.m. Where operations permit.